For many years, I was an email-only chick, through and through. I hesitate to even say when I FINALLY started texting, but I can assure you that it was long after the rest of the world. After I tentatively started texting, my next move on the social media front was to sign up for Facebook. I was pregnant and fighting morning sickness 24/7, so it gave me a somewhat entertaining option that could meet the requirements of staying horizontal on the couch while keeping my mind distracted from the ever-present nausea. Catching up on the latest adorable pictures of the kids, the recent vacation, the family visit, crazy wedding receptions, the incredible night out with friends. Does anyone besides me ever feel like I'm comparing the most boring parts of my life with the most exciting parts of everyone else's life on Facebook? For a few reasons, I decided to take a step back for a while and then re-enter Facebook World more cautiously, including a tighter circle of people and limiting my use so that I still emerge from the office "cave" to interact with the rest of life.
Then, along came an invitation to Pinterest. A relative who knew of my constant craving for crafting (nice alliteration, thank you) mentioned that I might want to investigate. Still being wary of Facebook re-entry, I opted for a Twitter account to access Pinterest. I will be honest and admit that I'm not exactly swept away in the Twitter craze at the moment. I'm not married to a Blackberry (I don't even own one!), and I don't feel overly compelled to know every move that is made by people I follow. I'm a lazy Twitter user, the one who gets annoying messages like "We've missed you on Twitter!" cluttering my inbox. Nonetheless, it seemed like less work than Facebook so I signed up and connected to Pinterest.
Sigh. Ahhhh. Oh, Pinterest, I am drawn to you the way I'm drawn to great design blogs. I can go on and on. I confess that there have been a couple of afternoon nap times that were spent getting completely lost in my vision boards or simply surfing the scenery. Tasks that were meant to be accomplished during nap...oops. Later.
I am continually boggled by how much creativity is out there! Amazing. I'll never be able to actually finish all the ideas I see displayed, but it's fun to dream about some and try a few.
I'm here at Pinterest.

Showing posts with label Create. Show all posts
Showing posts with label Create. Show all posts
Wednesday, February 29, 2012
Wednesday, June 22, 2011
Tweaking the Apartment
I'll always be trying something new!
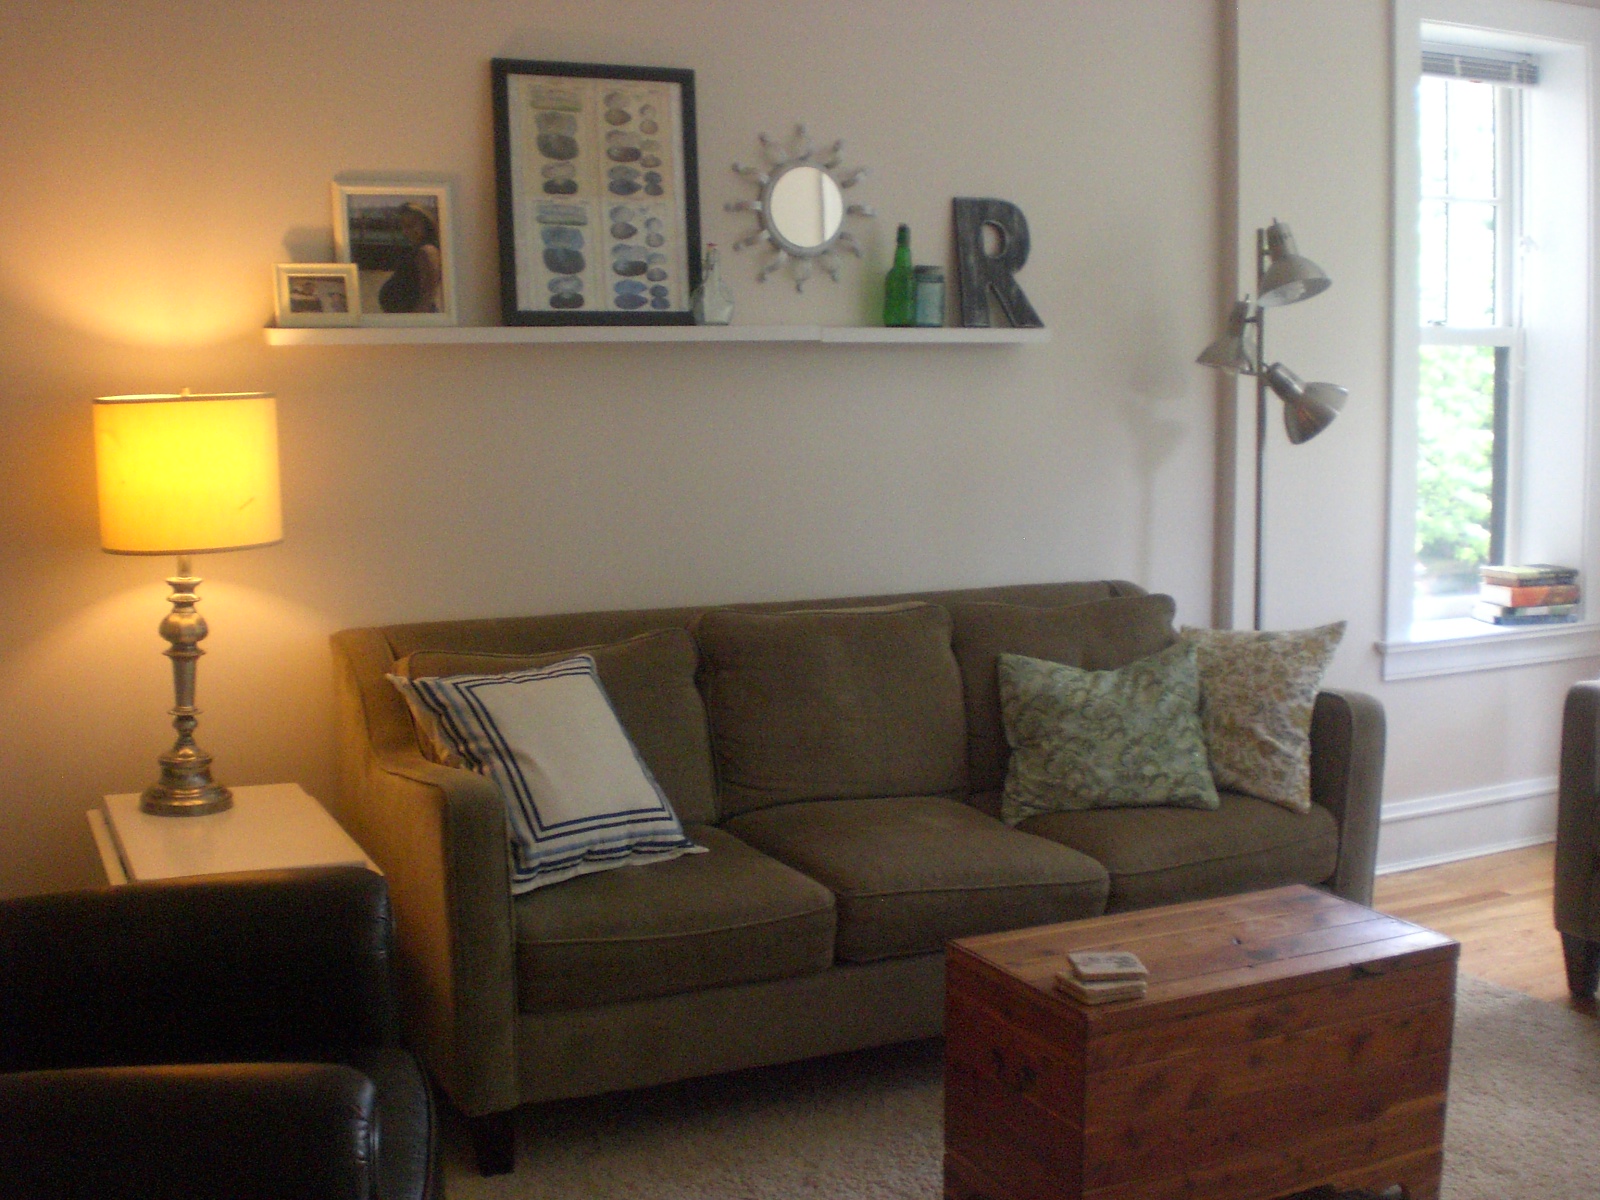
I love blues and greens. No matter what I do in my homes, I'll always incorporate different shades of those two basic colors in at least some of the rooms. I typically lean towards lighter, softer shades of blue. However, recently I have been interested in bringing some stronger color touches into the room.
Before, our large sofa area looked like this.

I still like this a lot, but since the spring I've wanted to bring in more blues with the summer season. There are a couple of different pillows in the room--I love the stronger blue lines around the border. It's a little more geometric in design than I typically use.


I changed out the large black Ikea frame from a vintage bird poster to these Natural History vintage shell printouts (Graphics Fairy blog). I painted some cardboard roughly for an edge and used Mod Podge to adhere four printouts to the center of the cardboard. I love the colors and the way it turned out overall.

Our TV stand used to look like this.

You can't tell from the above photo, but there is an open back under the top surface which allows a few cords to be visible. This always drove me nuts! So I did a new version, shown below.


The back is now finished with a cardboard shape I cut out to fit the space and covered with sale fabric. No more cords, and I like the beach vintage vibe of the fabric! You can also see that I tried to create a grouping of pictures. I've always loved that look but have never really done a random group of frames and photos. Some of the frames display printouts are from the Graphics Fairy blog. GREAT resource!

The bottom piece is a ceiling medallion from Home Depot. I made a background with a botanical print from Graphics Fairy and put a picture of my dad and my son in the middle. I am going to experiment more with different ways to use the ceiling medallions in the future, next time using paint to accentuate the designs around the border.
Our living and dining rooms are connected by a wide doorway with a nice flow. I don't like too many things out in both rooms, it makes me feel overwhelmed. It takes away from the beauty of a few items when there are so many to look at all at once. So I removed some items from the dining room to keep it simple.


In the photo below, I covered a piece of cardboard with a burlap remnant I found and used upholstery tacks I had left over from another project to update our dining room photo board. I used a couple of black and white photos my son and I took recently for Father's Day. I slipped it inside a garage sale frame that I got for about 50 cents and had already painted earlier. The burlap coordinates with the khaki sofa fabric from the living room.


A few tweaks and a few dollars and we're soaking in the beach vintage vibe I enjoy so much. My taste is still evolving and I can't change everything at once, but it's a lot of fun to experiment! Now...the craft projects and tweaking MUST be done as we have guests coming this weekend to stay for a week. The fun part of preparations is done and the grunt work begins...CLEANING. I have a wonderful friend who is going to take my son for a day while I do my best to get our apartment ready for nine people to live together. Whew.
I love blues and greens. No matter what I do in my homes, I'll always incorporate different shades of those two basic colors in at least some of the rooms. I typically lean towards lighter, softer shades of blue. However, recently I have been interested in bringing some stronger color touches into the room.
Before, our large sofa area looked like this.

I still like this a lot, but since the spring I've wanted to bring in more blues with the summer season. There are a couple of different pillows in the room--I love the stronger blue lines around the border. It's a little more geometric in design than I typically use.

I changed out the large black Ikea frame from a vintage bird poster to these Natural History vintage shell printouts (Graphics Fairy blog). I painted some cardboard roughly for an edge and used Mod Podge to adhere four printouts to the center of the cardboard. I love the colors and the way it turned out overall.

Our TV stand used to look like this.

You can't tell from the above photo, but there is an open back under the top surface which allows a few cords to be visible. This always drove me nuts! So I did a new version, shown below.


The back is now finished with a cardboard shape I cut out to fit the space and covered with sale fabric. No more cords, and I like the beach vintage vibe of the fabric! You can also see that I tried to create a grouping of pictures. I've always loved that look but have never really done a random group of frames and photos. Some of the frames display printouts are from the Graphics Fairy blog. GREAT resource!

The bottom piece is a ceiling medallion from Home Depot. I made a background with a botanical print from Graphics Fairy and put a picture of my dad and my son in the middle. I am going to experiment more with different ways to use the ceiling medallions in the future, next time using paint to accentuate the designs around the border.
Our living and dining rooms are connected by a wide doorway with a nice flow. I don't like too many things out in both rooms, it makes me feel overwhelmed. It takes away from the beauty of a few items when there are so many to look at all at once. So I removed some items from the dining room to keep it simple.


In the photo below, I covered a piece of cardboard with a burlap remnant I found and used upholstery tacks I had left over from another project to update our dining room photo board. I used a couple of black and white photos my son and I took recently for Father's Day. I slipped it inside a garage sale frame that I got for about 50 cents and had already painted earlier. The burlap coordinates with the khaki sofa fabric from the living room.

A few tweaks and a few dollars and we're soaking in the beach vintage vibe I enjoy so much. My taste is still evolving and I can't change everything at once, but it's a lot of fun to experiment! Now...the craft projects and tweaking MUST be done as we have guests coming this weekend to stay for a week. The fun part of preparations is done and the grunt work begins...CLEANING. I have a wonderful friend who is going to take my son for a day while I do my best to get our apartment ready for nine people to live together. Whew.
Tuesday, May 17, 2011
A Trio of Projects
As my husband knows well, I cannot go very long without finding a new project to work on. This past weekend I had to go to a location of the IL Secretary of State to renew my drivers license. Unfortunately my notification got stalled at the bottom of a pile and I missed the time frame to do it online--darn. My Mr. graciously called and offered me the free ticket to stay out and enjoy myself for a while after I finished the lovely waiting line and beautiful new license picture. When I told him I'd like to go to the fabric store, he was concerned that I was "running errands" and not doing something fun for me. Ha! Can you believe that?
So...the first of my trio starts back with our January trip to Florida.

I guess sometimes I'm just a grown-up kid because I still love to collect shells. After scrambling all over the beach while my dad entertained my son by the waves, I brought my goods home to IL. I used them to make the wreath to remember my little guy's first big vacation/beach trip. I bleached the shells, broken sand dollars, and other interesting beach pieces because...WOW! What a smell. Then they were stored for several months while I got sidetracked with other projects. Recently I picked up a styrofoam disc for a couple of dollars and used a straight edge to cut out the middle for a wreath shape. I used my hot glue gun to adhere the collection to the shape base and wrapped an old piece of linen fabric around the wreath to hang it up.


I started wrapping the jute around the base of the container, using Mod Podge and a foam brush.

As the shape of the container began to change, I switched to the hot glue gun since I needed the extra hold around those tricky curves. I continued wrapping and gluing all the way to the top.


to a more clean, simple background. I removed the stapes and fabric from the canvas and stretched out the new white fabric across the frame. When the new fabric was stapled to the canvas frame, I pressed in upholstery tacks to the canvas around the border. I changed out some of the decor for summer as well.

I find myself shifting with the seasons and craving new colors as each season rolls around. However, I want to be careful not to be too caught up in the acquisition of stuff just to satisfy my desire for new eye candy at home. In order to be wise with what we've been given, I do a lot of recycling with old materials and items. I like to shift the decor around from room to room, rearrange vignettes, purchase a new piece of fabric on sale for a few dollars, use my craft supplies to make something new, or hit up a flea market or thrift shop with a bargain or two to bring home. I'm striving to be more careful about purchases in general, and to donate items we will not be using any longer.
I'm a woman who loves color, style, and design. I'm not proud of this, but it can be particularly hard for me to exercise restraint with both clothes and home decor. This past year the word "discipline" has popped up for me quite frequently so I've been challenged in this area. I don't believe that means I should never buy anything or never spend any time working on my home, but I am learning to live more creatively and carefully with the blessings God has provided for us.
She looks well to the ways of her household and does not eat the bread of idleness.
Proverbs 31:27
So...the first of my trio starts back with our January trip to Florida.

I guess sometimes I'm just a grown-up kid because I still love to collect shells. After scrambling all over the beach while my dad entertained my son by the waves, I brought my goods home to IL. I used them to make the wreath to remember my little guy's first big vacation/beach trip. I bleached the shells, broken sand dollars, and other interesting beach pieces because...WOW! What a smell. Then they were stored for several months while I got sidetracked with other projects. Recently I picked up a styrofoam disc for a couple of dollars and used a straight edge to cut out the middle for a wreath shape. I used my hot glue gun to adhere the collection to the shape base and wrapped an old piece of linen fabric around the wreath to hang it up.


Earlier this month, I made the jute "vase" you see in the above photo. I wanted something to pull in the color of our couches on that wall, but also maintain a vintage beach cottage style as well. So I started with the orange juice container we had just finished, some jute rope, Mod Podge, a foam brush, hot glue sticks and the glue gun, and a straight edge.

I started wrapping the jute around the base of the container, using Mod Podge and a foam brush.

As the shape of the container began to change, I switched to the hot glue gun since I needed the extra hold around those tricky curves. I continued wrapping and gluing all the way to the top.

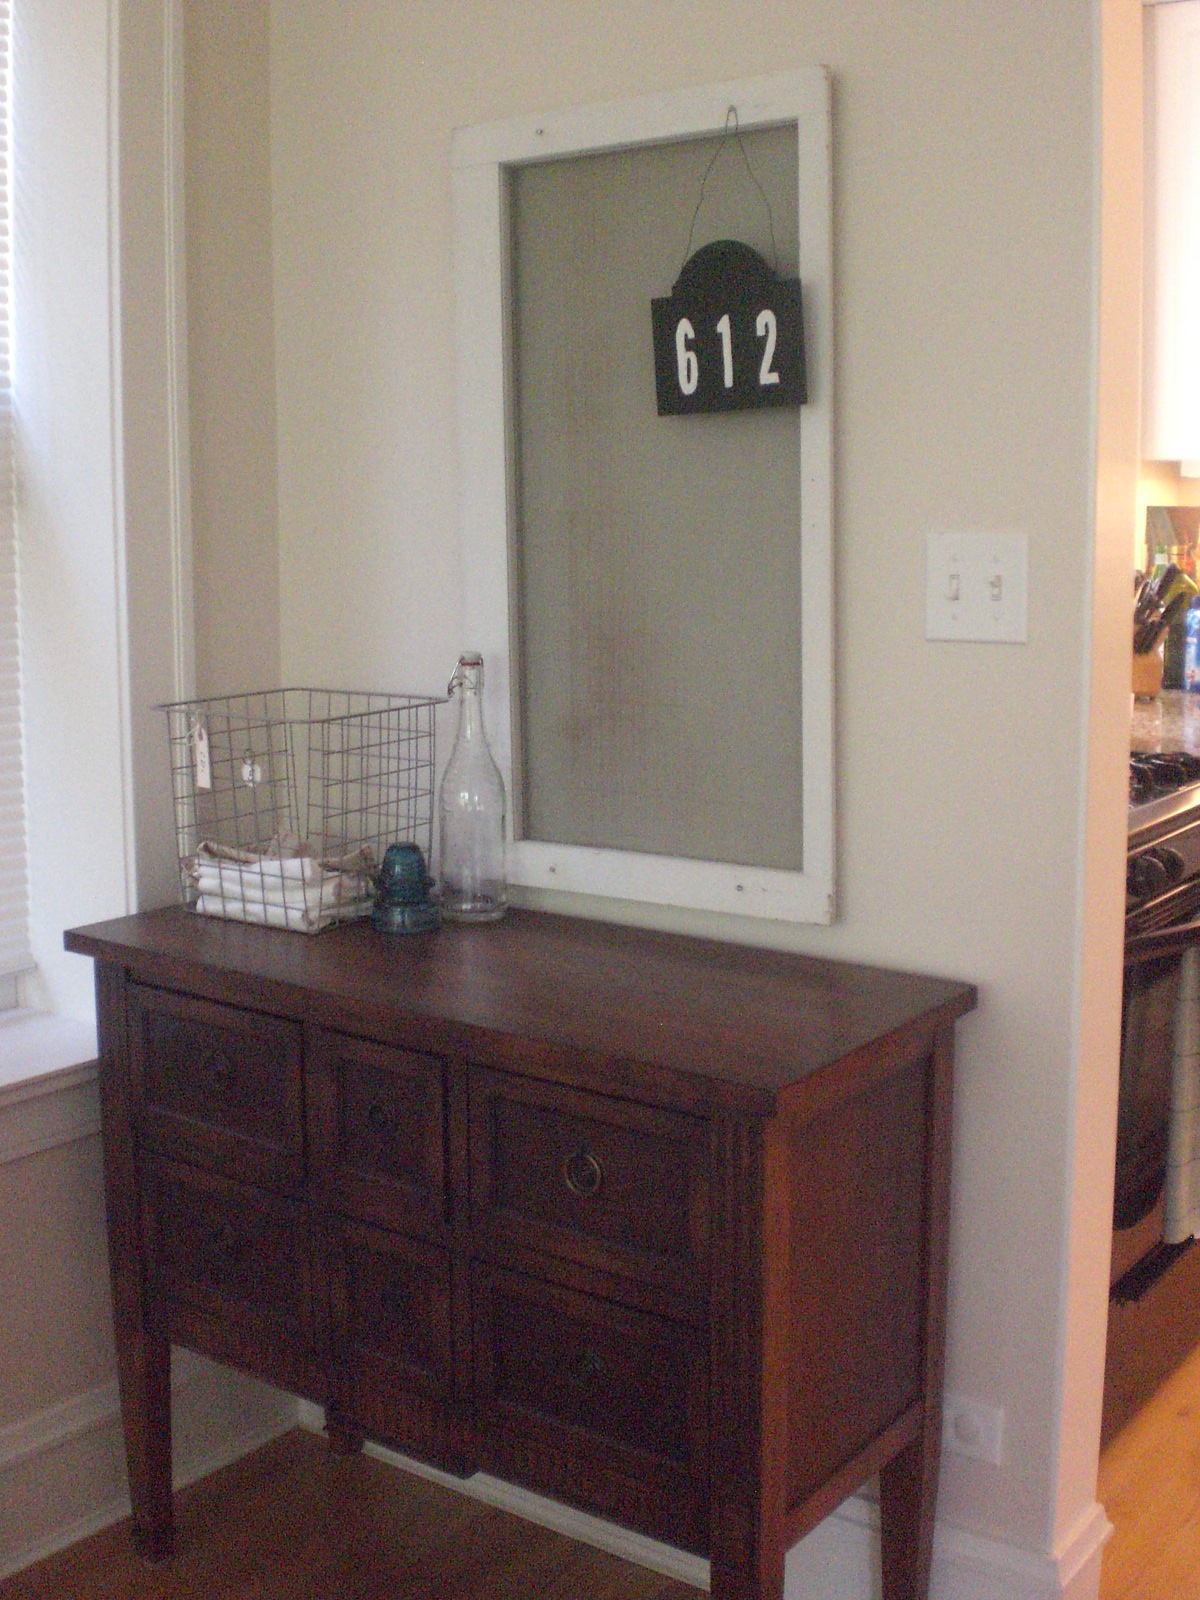
I also changed my dining room board from the farmhouse toile below

to a more clean, simple background. I removed the stapes and fabric from the canvas and stretched out the new white fabric across the frame. When the new fabric was stapled to the canvas frame, I pressed in upholstery tacks to the canvas around the border. I changed out some of the decor for summer as well.

I'm a woman who loves color, style, and design. I'm not proud of this, but it can be particularly hard for me to exercise restraint with both clothes and home decor. This past year the word "discipline" has popped up for me quite frequently so I've been challenged in this area. I don't believe that means I should never buy anything or never spend any time working on my home, but I am learning to live more creatively and carefully with the blessings God has provided for us.
She looks well to the ways of her household and does not eat the bread of idleness.
Proverbs 31:27
Tuesday, March 1, 2011
DIY Sunburst Mirror
There are certain design elements that I am drawn to every time I see them. I love mirrors! Not necessarily looking IN them, mind you, but I like the way they embellish a room. In a couple of weeks I'm going to be doing another mirror project...well, I'm getting ahead of myself. Most of the sunburst mirrors I have seen are quite pricey, so I decided to try one of my own. I saw a few ideas out there which were great, like this...
and this...
and this too.
I decided to head out to Home Depot and use a little of the above inspiration and little of my own. I like my version too!

Supplies
1. Collect supplies. Peel tags from plumbing pieces.

2. Lay out the desired spacing around wooden circle. For those who are more patient than I am, you may want to draw lines on the back of the wood circle to be exact! I just "eyeballed" it.

3. Start gluing the copper plumbing pieces around the wood circle. I started by placing two pieces across from each other. Imagine a line going from 9 to 3 on an analog clock, and then two more pieces placed at 12 and 6. These are your base pieces. It is easier to fill in from these starting points.


Note: Since the copper parts have a curve to them, it was necessary to elevate them on a pile of books while gluing. I started with a stool but the books worked more effectively. I also found that the curved shape of the pieces made it necessary for me to hold them securely in place for about 15-20 seconds before I let go.

4. Once the pieces are glued on, you may choose to cover up the holes in the copper pieces with beads or another embellishment. This is optional--I just preferred to add another detail to my design. Using the hot glue gun again, I circled around each hole with glue and then placed the bead over the top of each hole.


5. Now that the gluing is finished, the pieces can be painted. My pictures don't show this, but I used dark grey spray paint first and then white on top. I knew I would use sandpaper to distress the mirror, and I wanted a uniform base color of dark grey to peek through the white when sanding.

6. After the paint has completely dried, it's time to begin distressing! Take the sandpaper and sand as much as desired on the wood. A VERY light rubbing across the copper pieces which are your "rays" (as well as the beads) will also result in an aging effect.

7. (Optional step) I took a piece of craft paper, traced it to fit the circle and cut it out. I spread mod podge on the back of the paper so it would adhere to the back of the mirror. It's not perfectly flat, but it gives a more finished appearance.


8. Get a hammer and attach the picture hanging hardware.

Here is the finished project in my living room!


 |
| Photo by Isabella & Max Rooms |
 |
| Photo by Nesting Place |
 |
| Photo by Under the Table and Dreaming |

Supplies
- Plumbing equipment from Home Depot (I'm sorry, I cannot tell you what they are, exactly. I found them in the plumbing section with bins of similar equipment. See pictures below.)
- Round wooden clock base from Michaels
- Craft mirror
- Hot glue gun & glue sticks
- Spray paint
- Hardware to hang pictures
- Craft paper (optional)
- Mod Podge (optional)
- Beads (optional)
- Sandpaper
1. Collect supplies. Peel tags from plumbing pieces.

2. Lay out the desired spacing around wooden circle. For those who are more patient than I am, you may want to draw lines on the back of the wood circle to be exact! I just "eyeballed" it.

3. Start gluing the copper plumbing pieces around the wood circle. I started by placing two pieces across from each other. Imagine a line going from 9 to 3 on an analog clock, and then two more pieces placed at 12 and 6. These are your base pieces. It is easier to fill in from these starting points.


Note: Since the copper parts have a curve to them, it was necessary to elevate them on a pile of books while gluing. I started with a stool but the books worked more effectively. I also found that the curved shape of the pieces made it necessary for me to hold them securely in place for about 15-20 seconds before I let go.

4. Once the pieces are glued on, you may choose to cover up the holes in the copper pieces with beads or another embellishment. This is optional--I just preferred to add another detail to my design. Using the hot glue gun again, I circled around each hole with glue and then placed the bead over the top of each hole.


5. Now that the gluing is finished, the pieces can be painted. My pictures don't show this, but I used dark grey spray paint first and then white on top. I knew I would use sandpaper to distress the mirror, and I wanted a uniform base color of dark grey to peek through the white when sanding.

6. After the paint has completely dried, it's time to begin distressing! Take the sandpaper and sand as much as desired on the wood. A VERY light rubbing across the copper pieces which are your "rays" (as well as the beads) will also result in an aging effect.

7. (Optional step) I took a piece of craft paper, traced it to fit the circle and cut it out. I spread mod podge on the back of the paper so it would adhere to the back of the mirror. It's not perfectly flat, but it gives a more finished appearance.


8. Get a hammer and attach the picture hanging hardware.

Here is the finished project in my living room!


I'm linking up to Transformation Thursday at Shabby Chic Cottage.and Frugal Friday at The Shabby Nest.
Thursday, February 24, 2011
Apartment Decor Updates
Unfortunately I have a sick kiddo this week. Most days we are on the go, out and about town, visiting friends and playing together. Not feeling well, my little guy has been content to just hang out, which leaves mama with no opportunity to trek outside (more about outdoor trekkin' soon...the weather with a little one has meant I need to explore in other ways!). So in the little windows of time when I'm not taking care of my guy, I've been working on a couple of tasks at home. I have a craft project that will be posted about once I am all done, so I'm excited to get that finished!
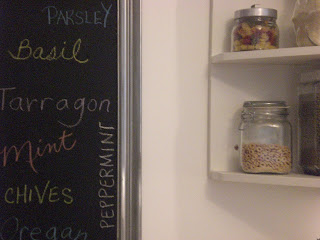
I also updated my kitchen chalkboard...long overdue. When we first moved into our apartment, I had a long space that needed "something." I took an old mirror we had, painted the mirror with chalkboard paint, sanded the frame down to look more distressed and hung it up next to the cabinets. It fit perfectly! My next thought was that I would write the new menu for each week on it. Yeah...right. I haven't exactly kept up on that, and our friends probably think that we eat the same meals week after week.
I decided to write something besides the menu and opted for some of my favorite herbs and flavors instead.


I also added a touch of Spring and Easter to my dining room. When I was at Target recently, I found some blue and tan eggs with nests (vase filler) which I used around the room. I'm loving birds as well...


It's good to keep creative when I can't get outside as much--it keeps me in a good place and loving life!
Subscribe to:
Posts (Atom)