 |
| Photo by Isabella & Max Rooms |
 |
| Photo by Nesting Place |
 |
| Photo by Under the Table and Dreaming |
Supplies
- Plumbing equipment from Home Depot (I'm sorry, I cannot tell you what they are, exactly. I found them in the plumbing section with bins of similar equipment. See pictures below.)
- Round wooden clock base from Michaels
- Craft mirror
- Hot glue gun & glue sticks
- Spray paint
- Hardware to hang pictures
- Craft paper (optional)
- Mod Podge (optional)
- Beads (optional)
- Sandpaper
1. Collect supplies. Peel tags from plumbing pieces.
2. Lay out the desired spacing around wooden circle. For those who are more patient than I am, you may want to draw lines on the back of the wood circle to be exact! I just "eyeballed" it.
3. Start gluing the copper plumbing pieces around the wood circle. I started by placing two pieces across from each other. Imagine a line going from 9 to 3 on an analog clock, and then two more pieces placed at 12 and 6. These are your base pieces. It is easier to fill in from these starting points.
Note: Since the copper parts have a curve to them, it was necessary to elevate them on a pile of books while gluing. I started with a stool but the books worked more effectively. I also found that the curved shape of the pieces made it necessary for me to hold them securely in place for about 15-20 seconds before I let go.
4. Once the pieces are glued on, you may choose to cover up the holes in the copper pieces with beads or another embellishment. This is optional--I just preferred to add another detail to my design. Using the hot glue gun again, I circled around each hole with glue and then placed the bead over the top of each hole.
5. Now that the gluing is finished, the pieces can be painted. My pictures don't show this, but I used dark grey spray paint first and then white on top. I knew I would use sandpaper to distress the mirror, and I wanted a uniform base color of dark grey to peek through the white when sanding.
6. After the paint has completely dried, it's time to begin distressing! Take the sandpaper and sand as much as desired on the wood. A VERY light rubbing across the copper pieces which are your "rays" (as well as the beads) will also result in an aging effect.
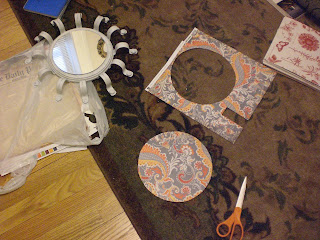
7. (Optional step) I took a piece of craft paper, traced it to fit the circle and cut it out. I spread mod podge on the back of the paper so it would adhere to the back of the mirror. It's not perfectly flat, but it gives a more finished appearance.
8. Get a hammer and attach the picture hanging hardware.
Here is the finished project in my living room!
I'm linking up to Transformation Thursday at Shabby Chic Cottage.and Frugal Friday at The Shabby Nest.


This is so cool! I love using stuff other than what it was intended for!
ReplyDeletelove this! so creative
ReplyDeleteThanks--me too! I like your blog, I'm going to try the letter idea when I finish some other projects. I just started blogging and you were my first comment ever...thanks!! @Lucy Designs
ReplyDelete